Exporting hours for a single employee
Instructions for exporting time and attendance records for a single employee over a custom or extended date range.
Last updated - Apr 17, 2024 at 10:45AM
Follow these steps to export timehseet hours for a custom date range and for a single employee:
In your TimeDock web dashboard, navigate to Setup > Employees.
Find the employee that you want to export hours for and click on the Edit button at the right-hand end of the record row.

If the employee has previously been deleted/archived, you will first need to temporarily restore the employee. Enter a temporary unique value into the employee Department textbox and click Save.
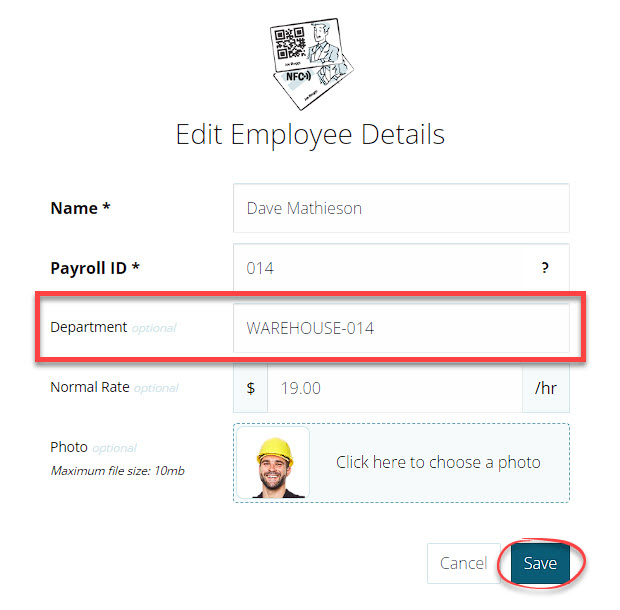
Append the employee's unique Payroll ID with a hyphen e.g. WAREHOUSE-014. This will make it easy to revert the department code back to the original value after you've completed your export. Navigate to EXPORT > Custom CSV.
Use the From and To fields to select your date range.
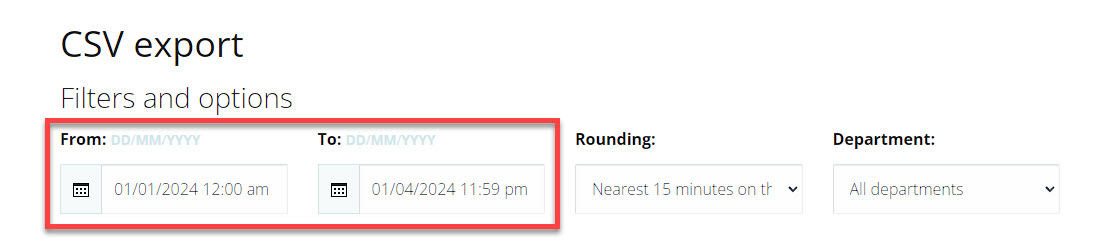
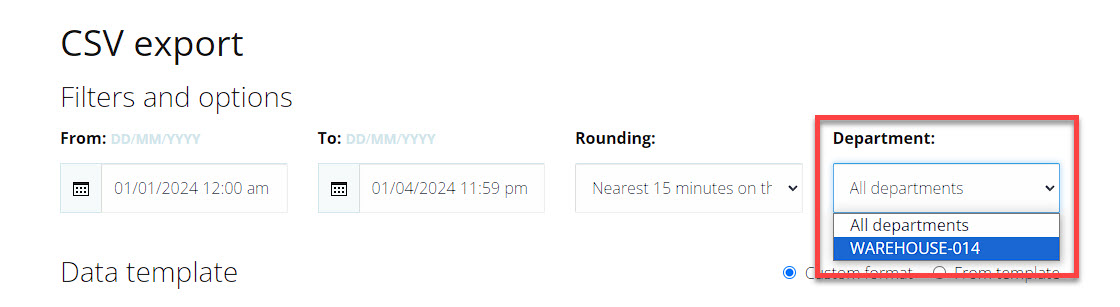
The maximum date range is 3 months. If you want to export hours for a larger range than this, you'll need to download multiple export files, adjusting the From and To fields each time. See step 9 below for how to consolidate data from multiple export files into a single file. In the Department dropdown box, select the unique department code you entered for the employee in step 3.
Select the data columns and consolidation type you want to use, or select from an existing template. See Custom CSV export for more info.
Click on the Export to CSV button to download the hours for your selected date range.
If you're performing multiple exports for more than a 3 month period, follow these steps to consolidate into a single export file:
Open a new Excel Spreadsheet.
Open each of your CSV export files in Excel.
Copy the rows from each CSV export file and paste into your new Excel spreadsheet. Ensure to do this in the appropriate date range order.
Save the Excel file.
You now have a single Excel file for your desired date range.
Repeat steps 1 to 3 above to revert the employee's department code back to its original value.